Mar 15, 2012

Pink and Black Mini Album FINALLY! (pic heavy)

 Girly scrapbook


First, I want to show you my daffodils that bloomed on March 14, 2012!  I noticed them after dusk, so it's a little dark. That is incredibly early for them to bloom around here in northern Indiana!
It's not wonder flowers are blooming right now. We broke a temperature record for this date. It was 85F degrees (29C) here beating the old record of 76F!!

And so, I know I've been teasing you all with this album for MOOOOOONTHS. In fact, it's only a couple months short of a year since I started it in May of 2011.  I hope it is worth the wait for those of you faithful enough to have been following along all this time. Bless you!

I will do a video, but I have been having issues just trying to get these pictures on here (of course I have). First, I noticed that my memory stick for my camera was down to THREE pictures left and I did not want to delete anything. So, I went to Walmart to get another one. I get it home and realize it's the wrong kind for my camera. I did not realize that Sony now sells standard SD cards for their newer cameras, while mine takes the odd sized Memory Sticks. Ugh! So I had to take it back immediately and get the right one. I had to try to get that done right away because it's supposed to be rainy the next day and the lighting would not be good. I don't want to show every hidden detail with this album just yet because I want it to have some surprises left for the recipient. After she gets it, then I will post the video, along with the photos of the hidden features.

There are still a ton of photos to look at, so here we go!

Girl graduation scrapbook, pink, butterflies,


spread your wings


girly scrapbook page,


This butterfly charm helps keep the toggle clasp (for the closure) from slipping through from the other side. I saw the whole charm bracelet & charm idea on a YouTube video and I thought I saved whose it was, but now I can't find it. geeeeez... my apologies!

Each year has a pocket page on the right side to hold more photos.
Since the recipient is not a scrapbooker, or even a crafter as far as I know, so I tried to keep this mini as simple for her to fill with pictures without having to cut anything down or adhere, so I added the clear photo corners to these recipe card style photo mats.


Sorry about my lame photo skills here with the blurry shot .... this is the backside of the photo mats for journaling. I drew in pencil lines for her so she can easily erase them once they're filled in.


teen scrapbook page

The pink Lips and Hearts you see throughout the album are foil patterned papers that I believe are from DCWV, but not 100% sure on that. I think it's some kind of high school paper stack.


teen page

Some of the foil detail on the paper and I used Glossy Accents on the word "Music."


attitude scrapbook page
This is the photo insert front. I used the Forever Young Cricut cartridge for this portion. 

Here is the backside for a little hidden fun. ;^)


I used this key that I got at Joanne's to symbolize the recipient getting her driver's license during that year (I think).


Another pocket made from some very old flocked paper I got on clearance years ago at Target. They no longer carry this stuff. The butterfly is from Making Memories a few years ago. 

I received these darling charms of a hanger and dresses from a dear sweet friend of mine, Rose, from across the big pond in the UK. I noticed that one of the pink stones has already been lost out of the hanger. bummer.


I added the graduation cap & diploma tie in blue because that was the color she wore at her graduation. At least that's what it looked like in the photos I seen. 


This was the killer portion that really set me back and it still ended up way thicker than I wanted.


This is supposed to resemble a clutch purse, and is removable from the album! It's held on by velcro. I will relinquish all the details of how I hid this after she receives the album, so there will be another posting on this mini later.

 
This is the back cover.


This is the hair band binding technique I ended up doing because I didn't want the huge opening on one side that is sometimes referred to as "gator mouth".  Here are a couple of You Tube tutorials on how to do this method. 


This closure was intended to take on a charm bracelet look, but it didn't turn out as nice as I had envisioned. Her first initial is on there and she played softball, so I had to add one of those too, along with lots of other cute bits & baubles. I think it ended up being a bit too much, but I'm not touching it anymore. LOL!

I had several other plans for this book, but when it came right down to it, they just didn't end up working out or I couldn't find what I was looking for and had to scrap the ideas.

I just hope she likes it. I enjoyed making it, but I'm glad it's finally done.

 Photobucket 
I will be linking up to the following parties, as well as the ones posted in the Left side bar- go check them out!


Mar 8, 2012

Hello!!

I have been busy lately. I can't say that I've gotten anything finished in all this busy-ness, but with the warmer temperatures, it's getting me motivated to do something more than I've been doing the past 2 months, which seems to only be gaining weight and surfing the internet.

So with my extra weight cargo, I got my cargo in gear and started getting some things cleaned out that I've been saving for a garage sale. I had every intention of having at least ONE last year, but the hubby couldn't fit it into his schedule (he needed to clean out the garage) and it didn't happen.  So I did the next best thing instead and I took my daughter's old clothes in for my virgin excursion to a consignment store for children's clothes. It was a learning experience, yet decent enough that I will go back now that I know what to expect. I got a small amount of cash and decent amount as an in-store credit that I'll be sure to use!

*******************************************
Another project I started, but have not finished yet, is to get a few things organized in the laundry room closet. Mainly this top shelf.
 
It's always a disaster waiting to happen, and many have happened because I'm kinda short and can't really reach it well, since I'm only 5'2" (~sigh!*).  So I decided to pick up a couple of nice baskets at Walmart the other day. 

 I got this one for $5 and it was the last one!
I put all the loose electrical cords in this one.


I liked this straight and narrow basket for putting my paper sacks in that I use to put all my paper/lt. cardboard items in for recycling. Although, I don't like the way the bottom of this basket is made so much. It has the loose edges of the twigs sticking out and they "catch". I can see them breaking off over time :^(

I learned a folding trick for the sacks from someone's blog (gosh! I wish I could recall whose it was...) and it keeps them nice and neat looking and easy to store in this basket!  Here are the steps to folding them:


storing, organization, paper sack


 Here's the top shelf of the closet now! See how the sacks fit nicely in that basket all folded up?  ~LOVE IT!!
organizing bags


After that, I realized I was tired of all the boxes & pkgs. of light bulbs we have just tossed in the closet all hap-hazardly, so they got a basket too!  They didn't all fit, but it's still a huge improvement.

 Ahhhh! 

The closet still needs tons more work yet, but just those 3 things gave me some relief. (Don't even ask about all the spray paint cans or the way my hubby spells "candels" ;^)

*********************************************
Now on Wednesday, I worked on furniture and it nearly killed my arm. My carpal tunnel was bothering me so bad that night, I had to take some Ibuprofen before bed.

Here's what I worked on. I sanded the top of this the best I could.
oak table
I thought it was the coolest coffee table I'd seen in a long time AND it's solid oak! I bought it at a garage sale last summer for nearly a steal! I guess money wasn't a concern for the sellers, since they are millionaires. I just couldn't believe no one bought it by 2 o'clock in the afternoon which is when I finally showed up, especially for the price I paid. (sorry, gotta keep the price top secret cuz I plan on selling it when I'm done with it) 

I sanded the top because it had a lot moisture damage on one end, but it sanded out wonderfully. Now I'm trying to decide how I want to do her up. Paint the whole thing? Stain the top and paint the rest? Hmmm...any suggestions from anyone with a good eye?


Then, this is the other piece I sanded.
furniture
Sorry about the bad angle of this photo, but I was doing the sanding on my front porch....that's our firewood you see behind the table. I found this table at my local Habitat for Humanity ReStore along with another end table. I haven't started that other one yet. It cost more than the coffee table, but not by much.

And I was only able to start these new projects because . . . . . 

drumroll

please
.
.
.

I FINALLY finished the mini album I've only been working on for nearly a year! I actually started it in May, but what's a couple of months? Remember this?

Let's hope that I can get some pictures and maybe even a video made of it for next week.

 Photobucket
Parties I'm linking to:


Feb 24, 2012

More New Old Stuff - I know, I'm weird

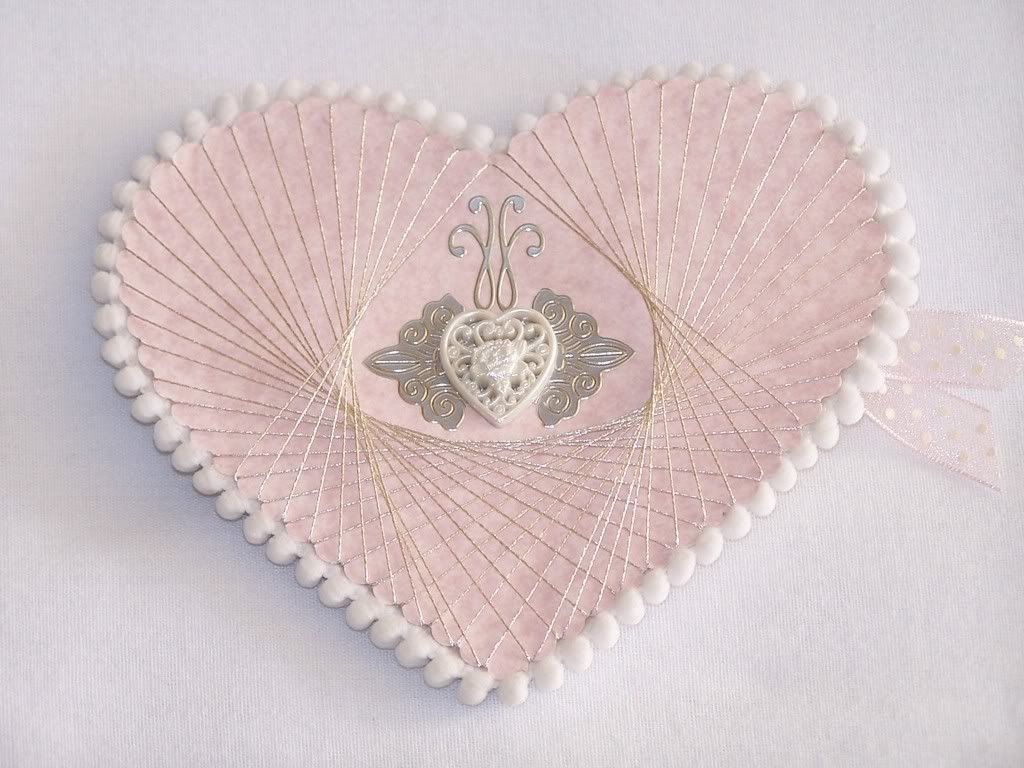
valentine's day card This was a Valentine card I made for my hubby a few years ago. Even though it was done several years ago, I still love it and my hubby still keeps it in a special place. awwww!


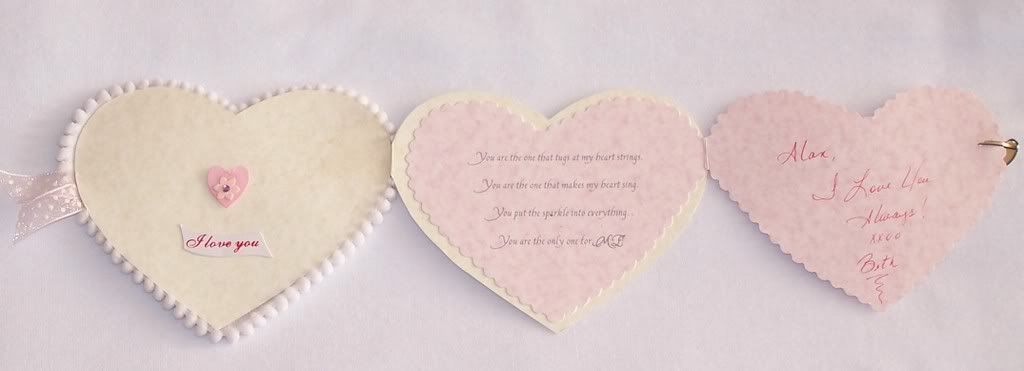
 Here it is with one flap opened.


This is all the way opened. Pretty mushy stuff, huh?  ;^) 

This was done back in the days BEFORE die cutting machines, except for Accu-cuts and I'm sure Sizzix was out, but too costly for me at the time. This was done with the small scalloped edge scissors and all by hand, except the flowers. The little flowers were some pretty stickers that a dear friend sent to me in a care pkg. that her hubby found. How lucky am I to have such dear friends looking out for me?

Anyway, this technique is called Spirelli. You can do this technique using simple shapes that have edges with peaks and valleys. Here is a link to a video I found on YouTube that's pretty good.

Hope you try this cool looking, but easy technique and send me a pic! It doesn't have to be just for Valentine's day, ya know. :^)

Photobucket 
I'm linking up to the parties listed in the left sidebar, as well as these:


Related Posts Plugin for WordPress, Blogger...