Jul 5, 2011

Another outdoor project complete.

We have been feverishly working away at trying to get things squared away for my son's high school graduation party this coming Saturday. Things are not complete & perfect around here & I'm sure they never will be. That's just how we are. human.

Anyway, we did manage to get half of one of those little projects done over this holiday weekend. Notice, I said HALF done. Yes, it is a rare occasion that any DIY project ever really gets 100% complete at my home. There are some, but they are few. They get mostly done, at least to the point that it can sort of look like it's complete to the naked eye, but upon closer examination you will notice that there is no baseboard trim or the trim piece between hardwood floor and carpet. Things happen that just prevent us from being able to finish what we start sometimes. It's either a lack of funds or a scheduling conflict that brings the project at hand to a screeching halt.

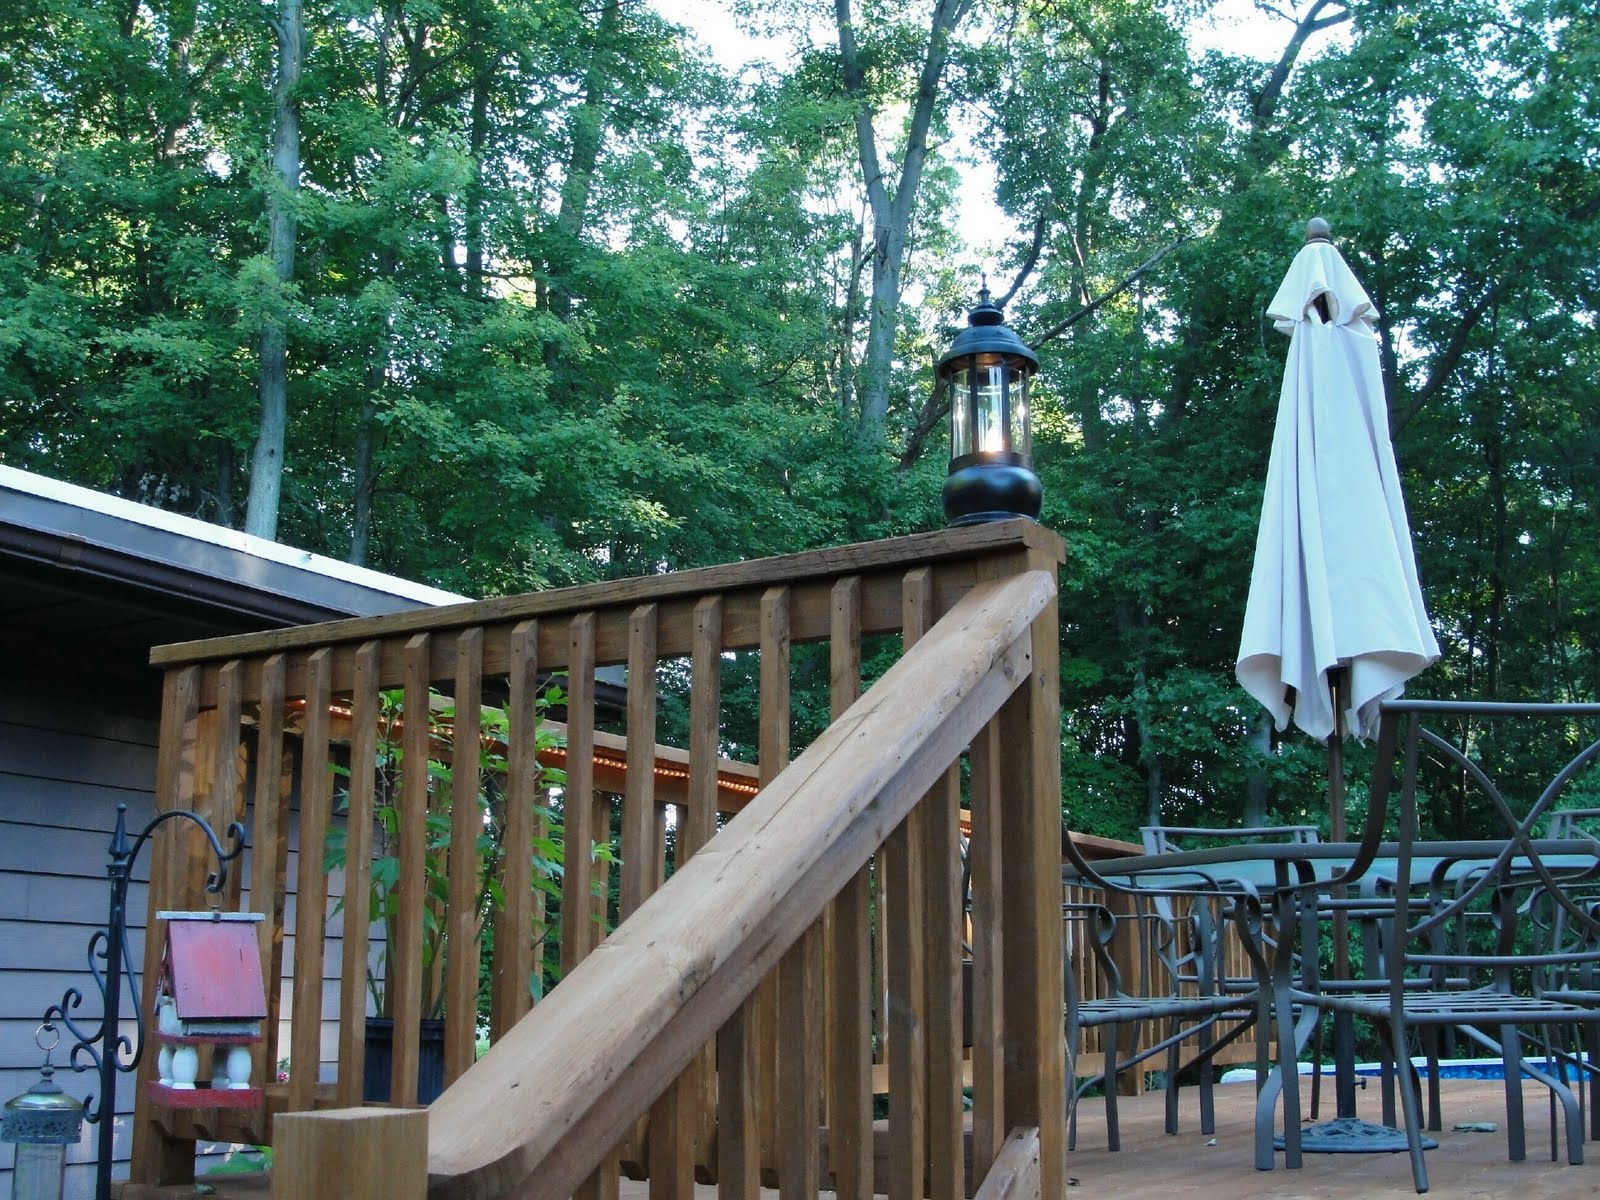
Well enough about that. Man, do I babble on or what? So we had purchased 4 candle lanterns maybe 2 years ago on clearance for $11 each. We thought that was still expensive (yes, we are cheap..e'hem "frugal") but compared to the $30/ea. we thought it was a good deal, especially considering what we really wanted to do with them! I was just thinking out loud about how cool they would look as lanterns on our deck if they were lights instead of candles. Of course, my hubby is very handy in all sorts of things. He said he could probably make that happen,s o we got them & they've been patiently sitting around for their debut. Two of them get their grand appearance to the world this weekend. The other two are going to have to wait for the other stairway some other time. I'm sure it won't be this year.....(picture rolling eyes here). The lanterns were originally a grayish green painted patina that I painted a satin black.

This is how they look with the lights off. We haven't put the cushions on the patio furniture yet because we don't want it getting wet before the party.


This is how they look with the lights on. Since I just took the pictures this morning so you don't get the full ambiance of them in the dark.


This is a view with one of the lanterns on, but you can see the rope lights on under the railing too.

We mostly have the yard work done, except for what will need to be mowed & weed eated right before the party. YAY!! Isn't it funny what it takes to light a fire under your butt to get things done that have only been put off for years??? This is part of why I have parties, so we can get stuff done that needed to get done a long time ago. LOL!!

I have also been working on finishing up recovering the cushions to my glider rocker that I've had since I was pregnant with my son. So far, it's coming along OK, but I'm intimidate by putting the old zipper in the new cover. The cushion is shaped funny & it's throwing me off. I guess I just need to do it!

I also need to most likely finish that other mini album I'm making because I invited the grandmother of the girl I made it for so that she can take it back with her. I'm not sure why I do some of the things I do to create more stress in my life, but that what I do!

So, with that, I will say adios. Possibly for the week. I really shouldn't even be on here today, but I think I'm having internet withdrawal. *snicker!*

God Bless & have a great day!

P.S. I've decided to link up to my first link up party with this Outdoors-In project at Funky Junk Interiors Blog.


Photobucket

Jun 27, 2011

Our pool deck is now stained!

I don't show too many photos of our house because even though at first glance it looks very cool, it had a ton of work that needed to be done, and still needs done. Once in while, we fit in one of the necessary projects, but in most cases, we end up doing the non-essential ones instead. Human nature I guess. A pool deck would be one of the non-essential ones. We bought the pool back in late 2008, built the deck the next year because it was a cold & rainy summer. I won't go into why it didn't get actually stained last year, but instead got a clear coat sealer on it...that would be a DH issue that I won't get into (rolling eyes here). Anyway. I decided this year the deck WOULD get stained & stained the color I want. DH tried again to side track my intentions, but I was having no part of it again. So I stripped the old sealer off with the cheapo electric power washer, yes I did it all myself, well DS helped a little on the last day & that was just the floor part.


It's not a small deck & there are 2 stairways. We still have to decide what to do the cover the open bottom part of the deck. I know what I want, but it's not cheap. Of course it's not. Won't be happening this year either.

But, I'm really happy with how it turned out. I was actually shooting for a lighter color, but DH sprayed the stain on pretty heavy & it make it darker than I wanted, but maybe it will last longer that way & we won't feel like we need to stain it again next year or the year after.

I might be pretty scarce these next 2 weeks. I'm trying to get everything ready, cleaned & organized for my son's high school graduation party on the 9th of July. The invitations are sent & I started on a display board last week. I think I got the hardest part done & I managed to get that accomplished with my Cricut. I found this heart tugging poem way back when I first got internet & my son was only 4 years old. Yes, it touched me that much that I have managed to keep it all these years. I can't read it without choking up. I swear. Now all I have to do is get the photos & finish decorating it up for it's debut. I hope I can save the poem long enough to do it for my daughter's graduation too.

And so with that, I need to get some things sorted & put away & work on some projects for the party.

God Bless & have a great day!


Photobucket

Jun 18, 2011

Father's Day card

This is the card that I literally whipped together in about 15 minutes for my dad on Friday. I thought this paper from the Proper Gentleman line by Graphic 45 was awesome for making a card for my dad. I picked up the Billionaire Cricut Lite cartridge the other day at Walmart, since it was marked down (finally). I love the vintage masculine cuts on it & the clean cursive font is nice too. That is what I used for the title on this card.

this paper has cool, easy to cut vintage cars on one side of the paper & the fabulous looking advertisement collage on the backside. One piece of paper to make a card. Well, I did use some coordinating brown for the mat & letters. The key is from Joanne's. And a little tidbit that I discovered about those keys....if you sand the black paint off them, they're copper underneath. I didn't do that on this card, but I did on the masculine Graduation mini album that you can see here.


This is the inside of the card before I wrote the saying: "Any man can be a Father, but it takes someone special to be a Dad."

The frame cut is from the Cricut cartridge Ashlyn's Alphabet. The little circle emblem is cut from the Proper Gentleman line by Graphic 45. I was going to ink the edges of this with Tim Holtz Tea Stain Distress Ink, like I did on the front, but forgot because, like standard operating procedure, I was pressed for time to get this thing off to the post office before the pick up deadline.

I've still been working on the other pink & black graduation mini album, but I'm also trying to get things cleaned, prepared & made for my own son's graduation party in a few weeks. I managed to get the back fridge cleaned. The laundry is mostly caught up & put away. That seems to be a major accomplishment in itself! I still need to work on some more scrapbook pages for the party & I have a special display board I want to make that seems to be a bit intimidating for me at the moment. I need to get some foam core board for it. I will be sending out photo invitations early this week.

I also received some distressing news about my mother. I have not spoke with my mother in over 2 years & even though she's getting herself into a serious predicament, as hard as it is to do, I am not going to help her get out of it. Just so that you can have a better understanding of my situation....my mother is mentally ill. She can be violent & tries very hard to be controlling. She treats me more like a child than she did when I WAS a child, not to mention that she makes serious accusations that is extremely disruptive & upsetting to my entire family. For those that tell me that I have to remember that she is mentally ill, it's so much easier said than done. She is persistent & annoying to a fault. She tires you out. I have dealt with this progressively my entire life. 45+ years is a long time to deal with something that is just escalating as she gets older.

So, if you can find a moment to say a prayer for her. I'm just praying that when her situation comes to a head, another door opens that will be better for her in the end.

God Bless & have a great day!
Photobucket

Jun 13, 2011

Collin's Graduation Album Done - FINALLY!! (pic heavy)

OK, I've been busting a hump trying to finish this mini chipboard album for my nephew by this past Saturday for his Graduation party. The end result did not live up to my expectations as I struggled with inspiration, cooperation, & my own motivation. The glue I used is excellent glue...except when trying to use it with metallic paper. Heaven forbid you should get any oozing out onto it anywhere because it's a BEAR to try to get off! My adhesive eraser worked some of the time, but did not seem to want to on the title banners, so yes, they look awful. disappointment.

The metallic doesn't show up well in these photos, but it was a hasty photo shoot an hour before we were to leave & one shot (not a significant one, at least) is pretty blury.

I will say that I only purchased a DCWV paper pack for this project, but I used very little of it in the end. The rest was all stuff I already had. That was a bonus! This is a really simple book, so there's not a lot of extra stuff or tons of details. No flowers, ribbon & very little bling. The only reason there is so much metallic gold in this one is that his school colors are dark red & metallic gold.

So, here we go:


Front Cover - Tim Holtz Gear Masks, tea stain inks & chipboard hinges with Coffee Shop Glimmer Mist. Binder wire too small, but biggest I had. Geesh! Who's idea was this album anyway? Oh yeah, mine.


Freshman Pages


Left hand - bad page,stuff crooked & puckered. :(


Right Hand - Simple tags in pocket. Behind tags is word "Memories" cut out. forgot photo. boo me.


Sophomore pages


Left hand


 Right Hand


Junior pages


Left Hand


Right hand


Senior Pages


Left Hand


Right Hand Senior Pocket page - empty


Pocket with photo inserts


Prom Insert


Prom Insert - Front


 Prom Insert - back


Australia Photo Insert (one of my favs)


Australia back


Moments Photo Insert


Moments Back


Colorado Photo Insert


Colorado Insert back


Class of 2011


Left


Right - kinda looks like a Disney page, don't it?


Back Cover - no big deal, just a little inking & more glimmer mist.


And, to top it all off, I put together a cluster of charms to put on the wire binder, but forgot to attach them before we left for the party. At least they'll be easy to add on. I swear I can't do anything without making a ton of mistakes. Some work out for the good, but not that often.

Thanks for stopping by today & I hope blogger doesn't make my post look screwy.


God Bless & have a great day!
Photobucket

Jun 8, 2011

Quickie project

So Monday was my daughter Brooke's last day of 1st grade. I was wanting to do up a plastic tumbler & they had some really cute ones at my local Walmart, but those sold out really quick, so I had to settle for this version instead. It comes with the soft rubber grip, I just added her name above it with the Hello Kitty font & the flowers from the George cartridge below the grip. Tied on a decorative tuft of hot pink tulle around the straw. I put it in a gift bag I made a long time ago. Made a sweet little tag for that & called it good. I didn't get a photo of the bag, but here's the tumbler.


I'm still working on the mini albums, but decided to take a break for today, well just a little break. I managed to get a few things organized & put away. You can't tell it when you look at my room, but I know there's a few less pieces of patterned paper laying around underneath the other stuff. LOL!!

I think the hardest part of making the guy album is finding paper that goes with the color scheme already in my existing stash. You would think with the 1,000's of sheets of paper & cardstock I have that surely this would not be a problem, but it is. I have managed to mutilate many sheets & the tricky part of this project is that his school colors are dark red & metallic gold. I only have (3) 8 1/2" x 11" sheets of metallic gold paper. Talk about your precious metal!! I can't screw up any of that stuff! I. always. screw. up. something. Always...

I would show the pages I have done, which I'm only done up to half of his Junior year, but I keep going back & adding little things to the pages that are supposed to be done.

My son is the same age as the guy I'm making the album for and I asked my son if he thought the book was masculine enough, but he thought it was too foo-fooish. I explained to him that if it's because of the shiny gold, that was part of the kid's school colors, so I was trying to incorporate that into the pages, without going all out on that theme. I personally think the book is done in good taste. There isn't a single flower in the album - yet. I might add some for the prom stuff, but I need to decide if I want to do a prom page by itself or just include them with his other senior photos. I will say this book is already kinda heavy & it's only half done without the wire binding. This will be the first actual book I've made using my Bind It All. I have the original blue one, but I'm thinking that I might like to someday get the We R Memory Keepers binding system instead. I like the idea of seeing where I'm lining my pages up with the punches.

Now, for the non-crafting part. I thought I was battling allergies, but now I'm not so sure that's what my problem is. I feel a little better today & I seriously doubt that I would only have allergies for 2 days. If it was just a cold of some sort, I'd rather have it be that because allergies can go on for too long.

OK, this ended up much longer than I had anticipated. I think I nearly put myself to sleep. (*yawn*)

God Bless & have a great day!

Photobucket

Jun 3, 2011

Another sneak & a different quickie project.

Before I show you the sneak peek and the quickie other project, I wanted to show you the misspelling I noticed on this paper from the High School paper pack from DCWV. Now, I would certainly hope that by the time you get to High school, you could at least KNOW how to spell the word SCHOOL. And if you notice, the "c" looks quite a bit like the "o" too. I mean, did this not stick out like a sore thumb to anyone there? OK. nuff said bout that.


I managed to get another page done last night on the girl mini album & it's a really simply designed pocket page. I like to make my pocket pages a little bit different than most & it's mainly for practical purposes than anything else. But I won't get into that until I post all the photos of the finished book, as long as I remember to do so.

I can see in this pic that there's a bit of glue over run at the edge so I hope I can get it off with my adhesive eraser. Speaking of adhesive, I hope I found one that is better than I've expected & it is great for doing durable projects like mini albums. Just out of curiosity, I picked up a little bottle of Elmer's Craft Bond double tipped glue. It's pretty cool. If you want a removable adhesion, apply & let dry before attaching. I bought it for trying to restick my Cricut sticky mat, but I seriously don't recommend it for that. It still bonds too good & lasts too long, BUT if you want it to be permanent, then apply & adhere while it's still wet & this stuff ain't coming off, not even with Undu! I don't know about Goo Gone tho.


OK, this next item is not paper related or anything like that, but it's quick & cheap even though I was hoping for a better result than I got. Totally my own fault, but I can live with it.


I picked up this little cement bird at a garage sale for $1.50 yesterday. I just love the design of these little birds.


This is the can of spray paint I used for the first coat. I wasn't wanting a satin finish, but that's what I had & I wasn't wasting gas to see if they had it flat & it just wasn't that big o' deal.


And this is what it looks like with it's first layer of paint. It almost looks like a clay pot color, but not irl.


And this is the final stage with the dry brushed flat paint. I'm thinking that maybe I should have used a foam brush since the regular brush I used was kind of soft & wanted to fill in the grooves more than I wanted it too & less in other areas (notice under the chin).


Well, time to get off here & work on food or something like that.

P.S. Holy smokes! I just got some awesome news that I'm getting a Christmas project published in the Cricut Holidays magazine!!! I am sooooo excited about that! This is the first project that I made specifically for a call, so I was hoping it would get picked up.
Photobucket

Jun 2, 2011

I think I'm over-booking myself

I must be a glutton for punishment, I tell ya. I have so many projects in "the works" at the moment & several others that I want to also start , it's not even funny. I need to be working on a graduation card for the son of some friends of ours because his open house is this Saturday. I am debating about putting forth the effort since this kid really could probably care less & I might just talk myself into just picking up a dollar store card for him anyway. I've made several hand made cards for him in the past, so I don't think he'll miss one this time. Him & his family was more impressed with my computer graphics on his first one than anything I've done with scrapbooking supplies and my Cricut since. blah. I just talked myself out of doing that one, now didn't I? *snicker...*


I also have been trying to get started on a mini album for my step-nephew, but have had a hard time getting the photos I'd like because his parents are clearly busy as well planning his graduation party. My hope was to have it done with photos so they wouldn't have to have another project to work on that isn't considered a priority or that it wouldn't ever get done with everything else they have going on non-party wise. But you have to just make do. I guess he gets what he gets & he has to make the pictures work with the design & I won't have to put some of the extra details in it that I had thought about doing that required having the photo already mounted. I just have a more challenging time working with boy/guy pages as it is.


So another project I'm working on is a surprise for the granddaughter of one of my deceased MIL's friends. My MIL is deceased, not her friend...just wanted to make that clear since it didn't really sound quite right. It will also be a surprise for my MIL's friend because I haven't told her that I was even thinking about doing it. However, I'm not worrying about putting a whole lot of extra space for photos in her book, since I don't know the granddaughter at all. I've only seen a few photos of her & I may try to sneak some into the album if I think about it or have time. I'm also don't know her real tastes, but I know she already has some tattoos, so I'm guessing I'm on the right track with this book, at least a little.


Anyway, here are a few sneaks of the cover & the first page so far. As usual, I don't have a plan for how I'm doing this, I just pretty much wing it as I go. LOL! I stopped planning things with all the details long ago because I always end up having to change those plans at the last minute anyway, so I'm still winging it, even when I'm trying not to. I mean, I have very general ideas of how I'm going to do things, but that's the extent of planning & those typically change too. (insert rolling eyes here...)


I might just take a slight break now from this project and try to work on the insulated tumbler for my daughter's 1st grade teacher & then I really need to get going on my nephew's album. I sure could use some cool inspiration for his book, but then again, I can't afford to go out & buy more stuff to work on it. So, here I go now...going to go work on it...yep...that's what I'm gonna do...right after I try to find some more inspiration on YouTube again. LOL!!


God Bless & have a great day!

Photobucket

May 25, 2011

Posts are getting kinda skimpy, eh?

I know I have not been keeping up with my blog very well & I tend to lose people along the way because of that. I guess that's the price I pay for trying to get things accomplished around my house & outside when the weather turns warmer. I'd rather be outdoors any nice day...except when the mosquitoes are sooooooo bad that they're swarming around the doors just waiting to get sucked inside whenever it opens. We've had so much rain here in the past few weeks that the nearby dried up swamps are quite full now & we even have standing water in our back woods. At least the front woods are dried up now, but more rain is expected today with possible severe storms later on.

I do have a bit of crafting news to share though. Quite by surprise, I received this in the mail on Monday. Isn't that card on the front awesome?? No. It's not mine, but it sure is pretty!


I was so happy that Northridge Media decided to ship one copy of the current Cricut magazine out so we can see our projects that were published in a much more timely fashion, instead of having to wait several months AFTER it's been out on the market.

Here is MY page of Brooke in the magazine!! Would you believe that this is the very first project I ever worked on with a Cricut machine? It's true. I used the Expression machine at my local scrapbook store in my first year of being on their design team. I was SOLD!! It took a while to get one & I bought the Personal bug off a friend first, but I talked the DH into getting me one for Christmas less than 6 months later. I don't think I could craft without it now & as they say, the rest is history! hee hee....


I've been working on the suitcase project a little. I've been working on the coffee table project, a little - need more sanding and I'm working on recovering my glider rocker too. I've never refinished or recovered anything before, so these have been some interesting projects. I've come across some roadblocks in their completion, so it will still be a little while longer before they're done. I was hoping to get them done before I started on my nephew's graduation mini album & my own son's graduation party & going down to Indy to sign him up for college next month. So many things are happening so fast. Oh, and my daughter is home sick today.

And so, with that, I need to get started on something.

God Bless and have a great day!
Photobucket
Related Posts Plugin for WordPress, Blogger...