So bear with me here while I load up this poor blog with some of MY favorites of the year. Mind you, these may be craft projects and they may be paper/scrapbooking projects too. I always say that I'm an ADD crafter and do whatever strikes my fancy at the moment or whatever may inspire me.
Ready? Here we go!
This first one was a project that my hubby and I worked on in January when he lost his job. This is a little nook area in our kitchen. We wanted to add a lighted cabinet space under the counter to display the Phaltzgraf Brown Dripware dishes that was my hubby's mom's. She passed away 2 days after the devastating 9/11.
We already had the perfect glass doors for this project. They were some fireplace doors that were left in the house when we bought it. We're assuming they came from the one fireplace in the family room that now has a fireplace insert installed. We were tickled that they didn't get rid of the doors because they were PERFECT for this idea we had! What do you think? Yes?
We also bought the stone tile at our local Habitat for Humanity store and they had just enough tiles to make this project to my liking. And when I say just enough, that's exactly what I mean. There was NO room for error in cutting here, not even an extra ONE. Whew!
I had to hold the shop-vac while the hubby wet cut the bricks because it still blew a lot of dust. I also had to keep the dry towels ready when the others got too soaked. It was a mess, but so worth it in the end! People can't believe that it wasn't already there. They tell us that it looks like it was there all along. I think that's when you know you've done good. ;^)
This is the Father's Day card I made for my dad. It was incredibly simple, but had a lot impact, at least I thought so. hee hee! It was made with Graphics 45 paper. That is such awesome paper!
This next project is just the cover of a mini album I made for my step-nephew's high school graduation. If you want to see the full photo posting of this, check it out {here}.
This next picture is the display board I made for my own son's graduation party. It's really not that spectacular to look at, since it's just a collage of pictures of him through the years. The part I like the best about it is the poem in the middle and the fact that it was printed using my Cricut machine with the markers that fit in it. Pretty cool, huh?
This is a little mirror I altered from a Dollar Tree mirror. Everything was cut using my Cricut and cartridges. I thought it turned out really cute and my daughter was begging me to let her have it. I convinced her that she didn't need it nor did she have room for it in her room, so got over it. I sold this in my craft show.
This is kind of a dual project since my hubby finished the mantel he started a year ago and I made the stenciled huge chalkboard sitting on it. I made my own chalkboard paint in a dark brown with an almond trim. It's a huge piece and takes the right space for one this size! It hasn't sold, but had many admirers. (update: it's sold)
This is a little primitive picture I made from a garage sale frame. It had one of those cheapo gold frames stuck in the opening of it that didn't fit right...like someone was trying to make it work and it didn't. Hmmm?? It's been posted the most times of any of my other projects on Pinterest, at the time of this post.
This is the sign I made to hang on our tractor when we had it in the local Blueberry Festival Labor Day Parade. Simple, but cute, and it was the first larger project I had done with my Cricut and vinyl.
This table was my first furniture redo and I LOVED how it turned out! I was so tempted to keep it for myself and even the hubby was kinda wanting to keep it too. But when you're trying to raise money for a Disney Trip in the fall, greed outweighs wants and it sold in the first hour of my first craft show.
Here is pic of the post mark image I put on the top. This is just so cool, but not my original idea, in case you haven't seen this all over blogland.

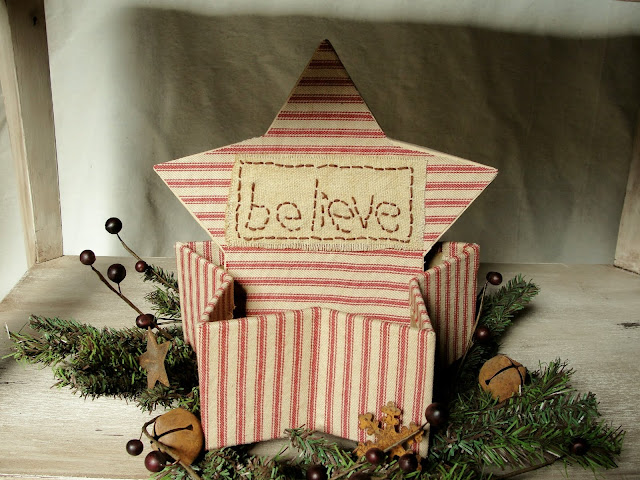
This is a paper mache star box I had bought at a garage sale years ago and finally altered with red ticking fabric and a hand stitched label on the top.
This is a 3 compartment box I got at the local thrift store and it was already pretty, with painted flowers and butterflies with a little quote painted on it, but it was rough looking and needing a new life. This is what I did with it.
Here is one of 6 witches hats I made for Halloween. I was so happy that they turned out, considering that I made my own pattern and dyed the fabrics myself by hand & it still worked out! LOL!
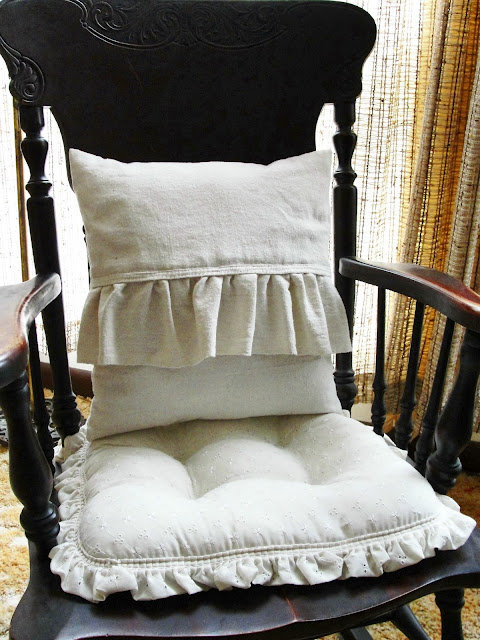
These are just a couple of faux grain sack (drop cloth) pillows I made this year. These are so pretty and loved the amazing graphics that you can find over at The Graphics Fairy blog!
Here is the backside of the pillow above that's on the right side. I just love the long ruffle and that these pillows are reversible with the image on one side and the decorative flap on the back with either the button edge or the ruffle.
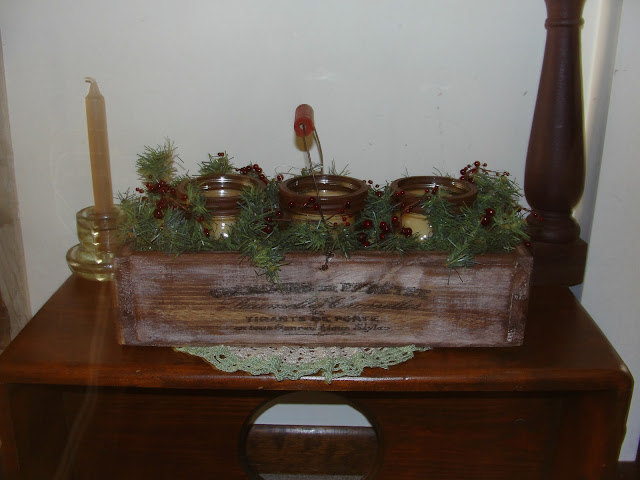
I think if I could have had a dozen of these next wooden boxes with the canning jars and candles, I could have sold every one of them!
It was a box that I picked up at the thrift store. I wish I would have taken a Before photo. It was originally painted a buttery ivory color with some sponge stamped hearts and Christmas trees on it. I started to sand the paint off and was liking the look. Then I did a coat of gel stain in Walnut that I rubbed on and then off and it looked perfectly aged. I added a graphic, again from the Graphics Fairy. Again, it was one of those projects that I was tempted to keep for myself, but it sold at my first craft show.
This fish sign was partly my hubby's inspiration. He has gotten so tired of seeing the infamous "Live Laugh Love" quote everywhere. He thought it would be funny to a guy if they had a sign with a play on that quote.
This next sign I made is one that started by me making it into a total mess! Oh my! It didn't end up going in the direction that was originally intended for it. Oh no it di-n't.
I painted it and the paint was crackling on me. I thought, Cool!, but then it all started to flake off in big sections - everywhere, that didn't look right. So, I sanded it off, which ruined the finish of the cheap paper finish of the board. It sat in my laundry room for weeks waiting for me to come up with something new, and hopefully good. One day, and I don't even know what sparked it in my head, but I thought that I could give it the look of old wood by covering it with scrapbooking paper that looks like that! Eureka! The rest just fell into place from there, which just happened to be at 10:30 in the evening, the night before the craft show. I like this so much, I AM going to make myself one too.
This triangle treat box banner is another one of those last minute inspirations that turned to success.
I had seen there was a call for treat boxes for the Cricut Magazine Holiday issue and on the last day of the submission deadline, I'm making these, taking photos and submitting at 11:30 p.m. And much to my surprise, they were accepted! AND, they were the feature project for the Treat Box section of the magazine!! To me, that's the next best thing to being on the cover! **UPDATE: Check out the magazine feature HERE!**
These next items are some drink glasses I made for my daughter's Tinkerbell themed 8th birthday party.
This was another fiasco (are you seeing a pattern here on how I craft?) that ended up working out better than I hoped. After much searching & haggling for the best deal, I bought some cute daisy cut lids for the jars, only to have them arrive and discover that they do not fit the jars! What? Are you serious? I'm not sending them back, but will hopefully find a use for those somewhere down the road. I should have just saved myself the money and hassle and just cut the design out with my Cricut, like I ended up doing at the last minute (again, another crafting pattern).
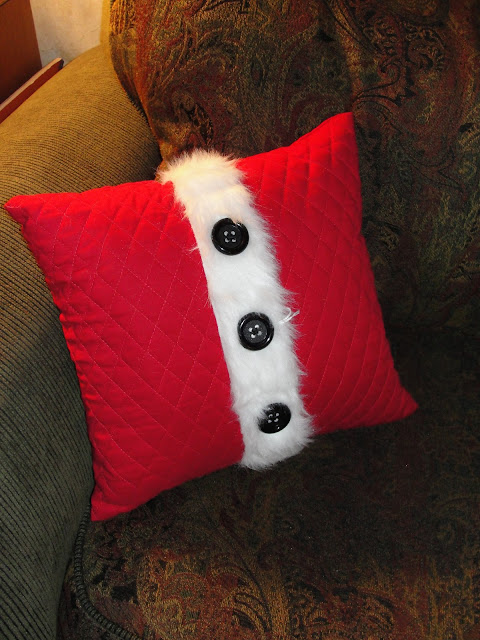
This is a different take on the faux grain sack button pillow I showed you earlier, but this is for Christmas. I just love these things!
Here is a stocking I made from a sweater I found at the thrift store. I like the colors and the fact that it could be for a guy or a gal, depending on their taste.
This is an idea I borrowed from another blogger that I just fell in love with! I can't find her name on her blog, but the blog is called The Old Block House & here is her post on this project.
I unscrewed the legs from the table top ironing board, covered it with cork, then added the awesome looking potato sack I found at the local farmer's market. Trimmed it in rope cording and made my own tacks with vintage buttons. Another project I'm tempted to keep, but will try to sell.
I hope you stuck around long enough to look at everything. Ya know, trying to pick your favorite project in a year is like trying to decide who is your favorite child.
So what was your favorite projects for the year?
Here are some places I'm linking up at:
God Bless and it's my wish for you to have a Wonderful 2012!!
